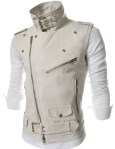
1 yard of patterned fabric (I suggest a polka dot-type pattern so it looks like suction cups)
1 medium piece of black felt, 1 medium piece of white felt (for the eyes)
white thread, black thread and thread of the same color as the felt you’re using
pins
about 5 lbs. of stuffing
a couple big sheets of paper to draw your pattern
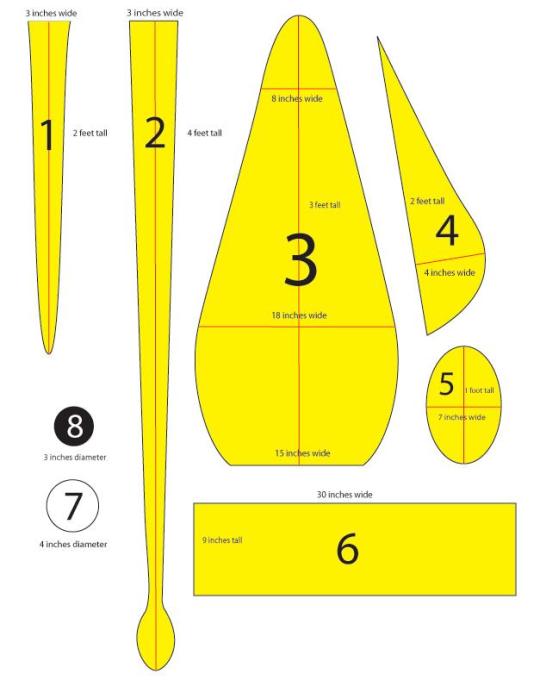
First, you need to draw out your patterns. Here’s a basic template to get you started, although most of the measurements are reasonably fudgeable. If in the likely event you don’t have any four-foot-long pieces of paper lying around, just tape a few pieces together.
Once you’ve drawn out your eight patterns, it’s time to cut the fabric. Pin the pattern to the fabric, laid flat, and cut out the following, leaving a half an inch or so of extra fabric around the edge of the pattern:
FOR THE ARMS: 8 felt and 8 fabric cutouts of piece 1
FOR THE, UH, LONGER ARMS: 2 felt and 2 fabric cutouts of piece 2
FOR THE BODY: 2 felt cutouts of piece 3
FOR THE FIN: 4 felt cutouts of piece 4
FOR THE HEAD: 1 felt cutouts of piece 6
FOR THE EYES: 2 white felt cutouts of piece 7 and 2 black felt cutouts of piece 8
So now you’ve got all your pieces ready, it’s time to start sewing them together. I did mine by hand because my sewing machine is busted and I get a kind of Zen buzz from sewing by hand, but if you have a non-busted one I recommend that you use it as it will be MUCH EASIER. You’re going to be sewing everything with the nice side of the fabric facing in, then turning it inside out to stuff it.
THE ARMS: (To make a quilted pattern that looks like suckers, see this other post). Pin together one patterned fabric piece 1 and one felt piece 1 (with the nice sides facing the inside). Sew down around the U-shape and back up, leaving the top open. Then turn the arm inside out, stuff it (it’s easiest to do both of these things if you sort of scrunch it up like you’re trying to put on a pair of tights, excuse the non-dude-friendly reference) and sew the top closed. Do the same for the other seven arms and rejoice in the fact that this is the most tedious part. Same deal with the two long arms, they’re just harder to stuff.
THE FINS: Pin together two of your piece 4s and sew together the curvy outer edge. Turn the piece inside out, so the seam you just sewed is on the inside, and start sewing up the other side, stuffing gradually as you go along. You should end up with a triangle-ish puffy thing. Repeat for the other two piece 4s.
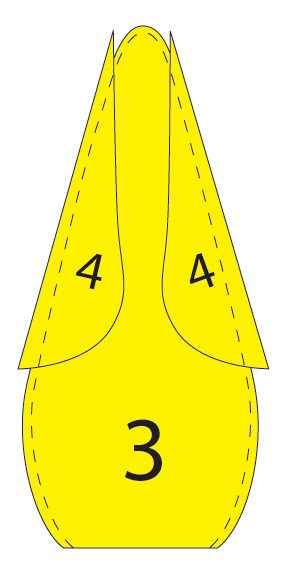
THE BODY: Put down one piece 3, then place the two fins you have down with the point up and the curvy side pointing in, then make a sandwich by putting the other piece 3 down on top. Pin it all together and sew around the edges with the two fins still inside, as shown. Turn it inside out and move on to…
THE HEAD: So take piece 6 and the ten arms you’ve already done. Lay the arms, fabric side facing you, out with the arms’ top seams in a line half an inch from the top of piece 6. The order should be arm arm arm arm BIG ARM arm arm arm arm BIG ARM. The legs should be almost entirely covering piece 6. Pin them in place and sew a straight line through the individual legs seams to attach the legs to piece 6.
When you pick up the other side of piece 6, you now have something resembling a really weird untied hula skirt. Sew together the two 9-inch ends of piece 6 with the fabric side of the arms on the outside, and keep it inside out for the moment.
PUTTING IT ALL TOGETHER: Fit the open end of the body through the arms (still fabric side facing out) and pull the edge all the way through the felt cylinder so it’s even with the edge that DOESN’T have arms attached to it. Sew around the diameters of the head cylinder and the body cylinder to attach them, then pull the legs down over the head and you’re almost done!
Stuff the body, then seal it off by sewing piece 5 over the open end (even if you do have a functional sewing machine, you’ll probably have to do this part by hand).
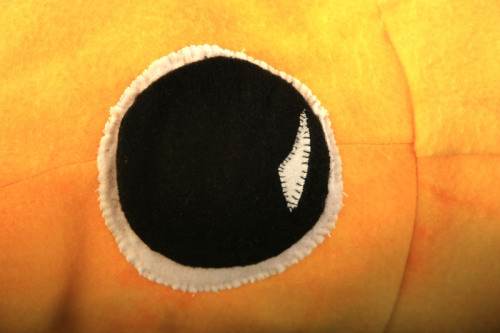
THE EYES: Sew the black circles on the white circles and whipstitch the eyes onto the head. You do this last because you can’t tell where they’re going to end up on the end product if you put them on before stuffing the body.
For artists who have problems with perspective (furniture etc.) in indoor scenes like me – there’s an online programm called roomsketcher where you can design a house/roon and snap pictures of it using different perspectives.
It’s got an almost endless range of furniture, doors, windows, stairs etc and is easy to use. In addition to that, you don’t have to install anything and if you create an account (which is free) you can save and return to your houses.
In Japan, land of quirky customs, quirky inventions and even quirkier homes,
some warm up in winter using what looks like a cross between a low
table, futon, reclining couch and a comforter. It’s called a kotatsu, and there’s a special heater built in underneath the table that warms the extremities of all who gather ‘round it. Or even sleep under it, as this writer recounts during her first winter in Japan.
And apparently, it can lower heating bills too, as Martin Frid explains on these pages some years ago:
Sitting by the kotatsu
heating table, under a thick blanket, is still the way for entire
families to keep warm on winter evenings. Rather than heating up the
entire house, the cosy kotatsu is a comfortable way to spend a couple of
hours together, with a much lower energy bill by the end of the month.
I’ve seen so much anime that a kotatsu just seems like a normal, everyday thing… even if I’ve never seen one IRL. Kinda made me confused to see it referred to as “a wacky invention.”
yeah it took me a really long time to process that a kotatsu wouldn’t be common knowledge in the west until i remembered that not everyone was a fucking weeaboo in middle school like i was